Showing posts with label bread. Show all posts

Saturday, July 2, 2011

Rosemary Bread

I don't know if you know this about me, but I'm very impressionable.  If I had the time and the money, I'd probably spend it all making just about every last thing I see all of you posting up on your blogs.  But I don't, so I have to choose.  And a tough choice it is...but it really helps when I already have all the ingredients, such as with this Macaroni Grill copycat recipe I saw at Brenda's Canadian Kitchen.


I've only been to the Macaroni Grill once or twice, and it's been quite some time ago.  So I honestly don't remember what kind of bread they served.  I just remember their macaroni was not grilled, which teed me off just a little.  But, if they are serving this type of bread, I apparently need to give them a revisit.   I love that this is easy and delicious.  And the smell of fresh bread is always a good thing, but when rosemary is added to the mix...that's just even more awesome.  


Make this, you'll be glad you did :)

1 cup water
1 1/4-ounce packet active dry yeast 
2 tsp. sugar
2 T extra-virgin olive oil, plus more for brushing and serving (divided)
2 1/2 cups all-purpose flour, plus more for dusting
2 T dried rosemary (divided)
1 tsp. fine salt
1/2 tsp. kosher salt
Freshly ground pepper

Stir the yeast, sugar and 1/4 cup warm water in a large bowl (or in the bowl of a stand mixer). Let sit until foamy, about 5 minutes.

Add 1 tablespoon olive oil, the flour, 1 1/2 tablespoons rosemary, the fine salt and 3/4 cup warm water; stir with a wooden spoon (or with the dough hook if using a mixer) until a dough forms.Turn the dough out onto a lightly floured surface and knead, dusting lightly with flour if necessary, until smooth and elastic, about 10 minutes. (Or knead with the dough hook on medium-high speed, adding a little flour if the dough sticks to the bowl, about 8 minutes.)Brush a large bowl with olive oil. Add the dough, cover with plastic wrap and let stand at room temperature until more than doubled, about 2 hours.*Brush 2 baking sheets with olive oil. Generously flour a work surface; turn the dough out onto the flour and divide into 4 pieces. Working with one piece at a time, sprinkle some flour on the dough, then fold the top and bottom portions into the middle. Fold in the sides to make a free-form square. Use a spatula to turn the dough over, then tuck the corners under to form a ball. Place seam-side down on a prepared baking sheet. Repeat with the remaining dough, putting 2 balls on each baking sheet. Let stand, uncovered, until more than doubled, about 2 hours.**Preheat the oven to 400 degrees F. Bake the loaves 10 minutes; brush with the remaining 1 tablespoon olive oil and sprinkle with the kosher salt and the remaining 1/2 tablespoon rosemary (work very quickly when you do this). Continue baking until golden brown, about 10 more minutes.***  Transfer to a rack to cool. Serve with olive oil seasoned with pepper.Makes 4 small round loaves of bread.

Thursday, May 26, 2011

Algerian Bouzgene Berber Bread with Roasted Pepper Sauce

To be honest, I really don't know what a couple of the words in that post title mean.  But I found this recipe printed out next to my husband's computer....I can take a hint.  So I'm not really sure of the source of the recipe.


It turned out to be a little more of a time investment than I expected, but I'm glad I made it.  You just can't go wrong with roasted red peppers.  I love the aroma when they come out of the oven.


The bread is pretty plain and simple, so it pairs perfectly with the zesty sauce.  


Here's the recipe for you


Ingredients

  • 2 red bell peppers
  • 4 tomatoes
  • 1 tablespoon olive oil
  • 4 cloves garlic, chopped
  • 1 jalapeno pepper, chopped
  • salt to taste
  •  
  • 2 pounds semolina
  • 1 1/2 teaspoons salt, or to taste
  • 3 cups water, or as needed
  • 4 tablespoons olive oil
  • 6 tablespoons olive oil for frying


Directions

  1. Preheat your oven's broiler. Place red bell peppers and tomatoes on a baking sheet, and roast under the broiler for about 8 minutes, turning occasionally. This should blacken the skin and help it peel off more easily. Cool, then scrape the skins off of the tomatoes and peppers, and place them in a large bowl. Remove cores and seeds from the bell peppers.
  2. Heat 1 tablespoon of olive oil in a skillet over medium heat. Add the jalapenos and garlic, and cook until tender, stirring frequently. Remove from heat, and transfer the garlic and jalapeno to the bowl with the tomatoes and red peppers. Using two sharp steak knives (one in each hand), cut up the tomatoes and peppers to a coarse and soupy consistency. Stir, and set sauce aside.  (I preferred just cutting the veggies up before putting them in the bowl)
  3. Place the semolina in a large bowl, and stir in salt and 4 tablespoons of olive oil. Gradually add water while mixing and squeezing with your hand until the dough holds together without being sticky or dry, and molds easily with the hand.  (I only ended up using about 2 cups of the water.)  Divide into 6 pieces and form into balls.
  4. For each round, heat 1 tablespoon of olive oil in a large heavy skillet over medium heat. Roll out dough one round at a time, to no thicker than 1/4 inch. Fry in the hot skillet until dark brown spots appear on the surface, and they are crispy. Remove from the skillet, and wrap in a clean towel while preparing the remaining flat breads.
  5. To eat the bread and sauce, break off pieces of the bread, and scoop them into the sauce. It will slide off, but just keep reaching in!


Thursday, December 2, 2010

Dark Chocolate Bread

Once again I was inspired by Monet of Anecdotes and Applecores to create a lovely sweet treat.  If this makes me some sort of a stalker, so be it!


It's a bread, and it's chocolate.  Only good things can come of it.  I had a little extra batter so I put it in a small round dish and baked it too.  


Monet is right, it's easy to over bake, so keep an eye on it...a few of my edges got a little too crisp.  But the inside is moist and wonderful.


 Either way, it's delicious!  I took it to work and someone there compared it to a muffin.  So I guess you could say it's a large delicious muffin in loaf form. 

Here's Monet's recipe....make it, eat some, share some, and be happy.

1 cup dark unsweetened cocoa powder, sifted  (I didn't sift, I'm dreadfully lazy)
1 1/2 cups all-purpose flour
3/4 cup granulated sugar
1 1/2 teaspoons baking soda
3/4 teaspoon baking powder
1 teaspoon salt
2 large eggs
1 large egg yolk
3/4 cup buttermilk
1/2 cup vegetable oil
1 teaspoon vanilla extract
8 ounces milk chocolate chips

1. Preheat your oven to 350 degrees F. Lightly grease a 9-by-5 inch loaf pan, dust lightly with flour and knock out any excess flour.
2. In the bowl of a standing mixer, combine brown sugar, cocoa powder, sugar, baking soda, baking powder and salt. Using the paddle attachment, mix until well-combined.
3. In a separate bowl, whisk the eggs and egg yolk until blended, then add the buttermilk, oil, and vanilla; whisk until combined.
4. With the mixer on low, slowly stream the wet ingredients into the dry ones, mixing until just combined. Slowly add flower and mix together. Stir in the milk chocolate chips with a spatula.
5. Pour the batter into the prepared pan and bake for 1 hour or until a toothpick inserted in the center comes out with just a few moist crumbs (it is easy to overbake this bread). Let the bread cool in the pan for 10 minutes, then turn out on a wired rack to cool completely.
*I think my bread pan was smaller so I only left it in about 45 minutes.

Spread with peanut butter...if you know what's good for you.
 

Thursday, October 28, 2010

Herbed Polenta, Rolls, and a Giveaway

I thought it was a stroke of good timing that I was contacted by a representative of CSN Stores to be able to offer you a giveaway, as this is my 300th post!  Woohoo, yay and all that!  I never really knew when I started this little blog that I would enjoy it so much and meet so many nice people along the way.  And getting to work with CSN Stores is a perk I never even dreamed of, and I never cease to be amazed at the variety of products they offer from  kitchen bar stools  to pet supplies.  I will fill you in on the giveaway details after I talk about the food :)


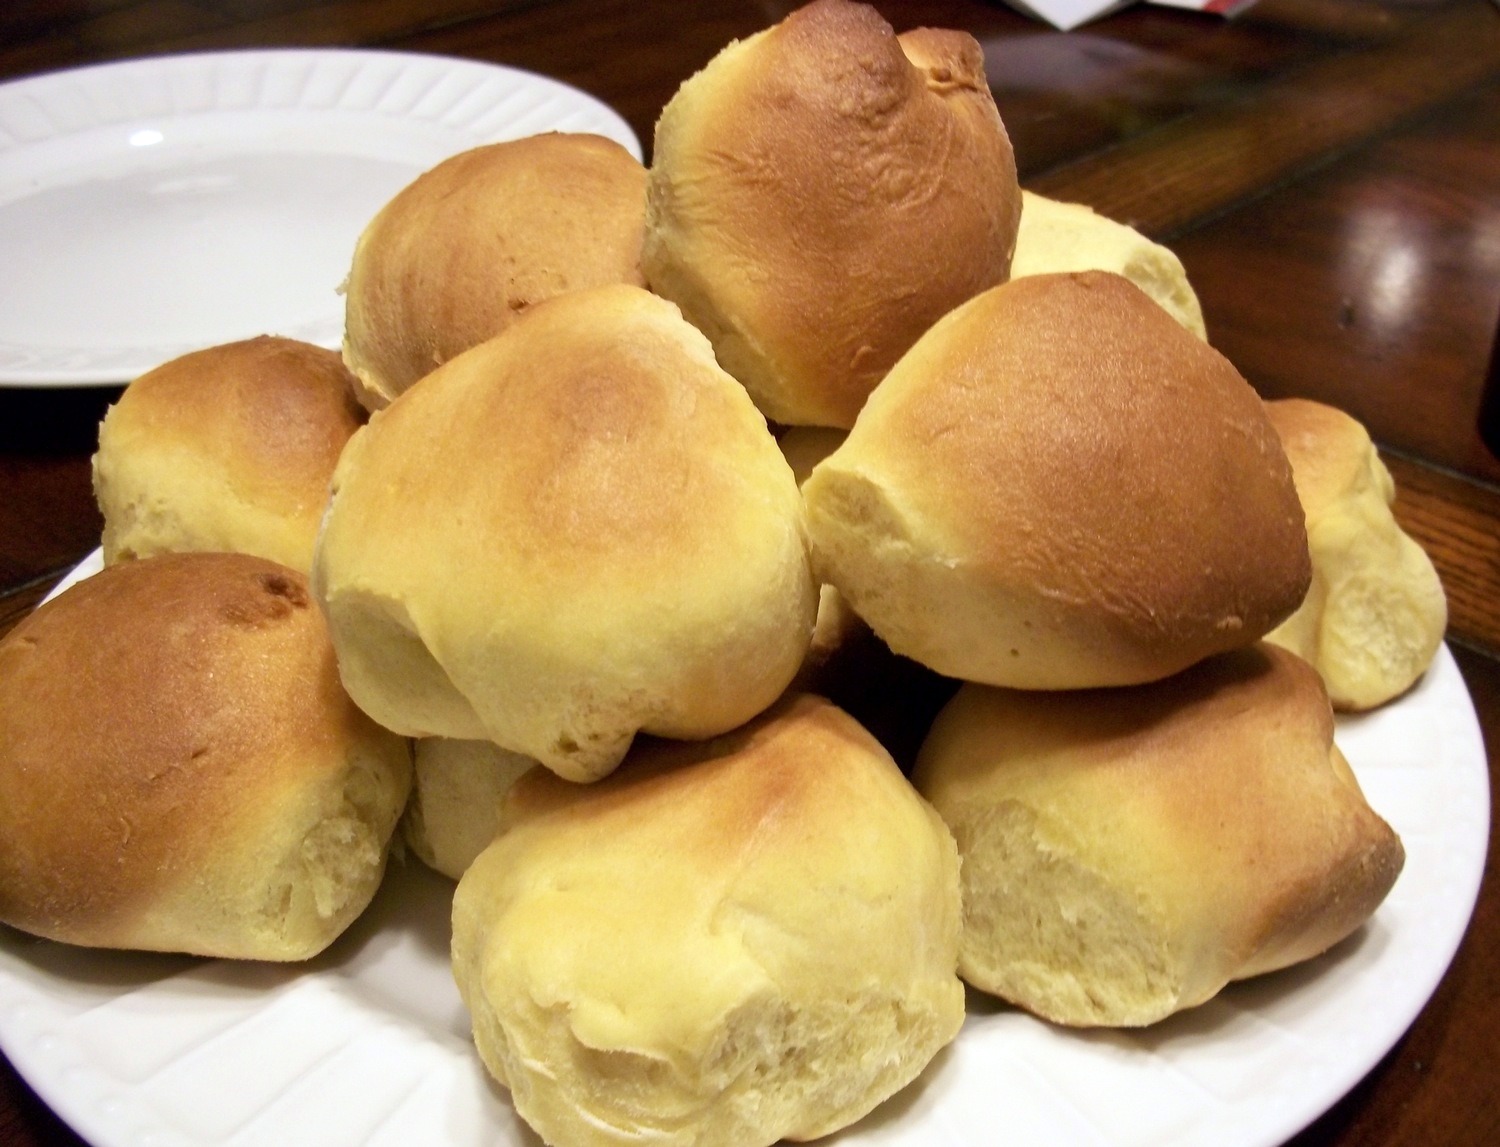
 I ran across the recipe for these rolls at a forum called Cuisine at Home, and was intrigued by them since they contain a custard mix.  They called them Custard Rich Rolls, which I thought was a little bit of an odd name, but whatever.  I liked them.  I liked the bakery-like smell and sweetness that the custard mix added to them.  They were pretty darned easy, only one rising, and I'd definitely try them again.  My husband found them too dense.  I tried to make them some little dunce caps for them but it just didn't quite work out.  


Here's the recipe:

Custard Rich Rolls

1 Cup Warm Milk 80F
1/4 Cup Water, warm 80F
1/4 Cup Butter Softened
1 Egg
1 tsp Salt
4 Cups Bread Flour
1/4 Cup Vanilla Pudding mix or egg custard or flan mix (I used the flan mix)
1 Tbl Sugar
1 Tbl Instant Dry Yeast

Mix all ingredients in a large bowl. After five minutes of mixing add 1 to 2 Tbl Water or Flour(whichever is needed).
Turn dough onto lightly floured surface. Form into rolls, place into pan and cover. Let rise in a warm place. About 1 hour.
Bake in a pre-heated oven 350F for 20 -25 minutes or until golden brown. Cool on wire rack for five minutes. Coat top with melted butter.


Tonight I also tried my hand at making Herbed Polenta that I saw at Girlichef.  The funny thing about cooking the polenta is that no matter how low I turned the heat and how much I stirred, it kept doing this volcanic thing right in the middle and spewing halfway up to the ceiling.  And onto my hand. 


 But it was worth it, just perfect with the brisket on top...yum!  Only bad part is that it made a massive amount and I'm the only one who likes it.  Anyone want to come over for polenta tomorrow??

Here's the recipe from Girlichef:

 9 c. water
1 Tbs. salt
2½ c. yellow cornmeal or polenta
1½ c. finely grated parmesan cheese
1½ c. whole milk  (I only used about 1/2 cup)
10 Tbs. unsalted butter, cut into pieces
~½ c. chopped mixed herbs...I used flat leaf parsley, fresh thyme, fresh rosemary, fresh chives
¾ tsp. freshly ground black pepper

Bring water to a boil in large, heavy pot. Add salt. Gradually whisk in cornmeal. Reduce heat to low, stirring often, until mixture thickens and cornmeal is tender, ~15 mins. Remove from heat, add cheese, milk, butter, herbs and pepper. Stir until butter and cheese melt. Serve.

So I'll plan to leave the giveaway open through Tuesday Nov. 2nd 10pm...Arizona time, whatever that is.  What's up for grabs is a $60 gift code to any of CSN's stores.  
To enter, just leave a comment of any sort and you're in (preferably a nice comment, if you tell me I suck it will make me cry). (I believe CSN ships to US and Canada)

For a second entry, hop on over to my Facebook page and click that "like" button.  If you do, or you already have, please let me know in a separate comment.

For a third entry, and this is a tricky one, if you can remember what I said many months ago (maybe years) that my favorite song is, you'll get an extra entry. (make this a separate comment too) 

Be sure I'm able to reach you in some way!

I'll plan to announce the winner on November the 3rd and contact you by email to let you know.

Thanks for playing!   


Monday, August 23, 2010

Butternut Squash Bread

Did I mention our abundance of butternuts?


I roasted one large and one medium-ish squash (split it in two, scoop out seeds, roast at 350 about 40 minutes); ran it through the food processor and got this much puree.


  Kinda made me wish I had a baby so I could feed it homemade baby food.  Not really, it's not worth the sleep deprivation.  

 I was able to make 3 loaves of bread out of the 2 butternuts.  I did one plain, one with slivered almonds on top, and one with slivered almonds and toffee chips.


  It's a lot like pumpkin bread, with just a little bit milder flavor. One can even pretend it's a little bit healthy (minus all the white sugar and processed flour).  Think I'll have a piece for lunch right now!


Butternut Squash Bread (from Food Mayhem) 

7.5 ounces butternut squash puree
1 1/4 cups white sugar
2 extra large eggs
1/2 cup vegetable oil
1/3 cup water
1 cup all-purpose flour
3/4 cup whole wheat flour
1 teaspoon baking soda
3/4 teaspoon salt
1/2 teaspoon ground cinnamon
1/2 teaspoon ground nutmeg
1/4 teaspoon ground cloves
1/8 teaspoon ground ginger

1. Preheat oven to 350 degrees F (325 degrees F with convection). Spray a 9×5 loaf pan with non-stick spray.
2. In a large bowl, whisk together butternut squash, sugar, eggs, oil, and water.
3. In a small bowl, combine flours, baking soda, salt, and spices.  Add dry ingredients to wet ingredients.
4. Bake for 55-60 minutes, or until a toothpick comes out clean. Cool on a rack till lukewarm before removing from the pan.
5. After it cools completely, wrap in plastic wrap and it will keep in room temperature for a few days. It actually tastes better the next day.
 

Friday, August 20, 2010

Monterey Ranch Bread

Ok friends, you definitely need to get your fat stretchy pants out for this one.  This is one carb loaded, butter soaked, cheese laden hunk of fabulosity.  I first saw this at Krista's Kitchen and just knew I had to make it mine.


 This was perfect to dress up our ho-hum spaghetti dinner.  Would have been even more perfect if I hadn't charred the bottom of it a little bit...oh well.  


Here's the recipe:

  8 Tablespoons butter, melted
1/2-3/4 teaspoon garlic powder
1 loaf French bread, split in half lengthwise
4 cups Monterey Jack cheese, shredded (or a blend of Colby Jack, Mozzarella, and Cheddar...basically whatever shredded cheese you have in the house)
1-1/2 cups ranch dressing
Fresh parsley for garnish

Melt butter and stir in garlic powder. Brush on bread with a pastry brush. Place bread under the broiler until it's slightly brown and crispy.

Combine cheese and ranch dressing and divide evenly over bread. Place in a 350o degree oven until cheese is melted, about 8-10 minutes.

Sprinkle with parsley once you remove from the oven. Let sit 5 minutes before slicing.


Did you see those way cool cucumbers on my plate?  


 These, I am told, are Armenian cucumbers.  I had never seen them.  Another one of the fruits of my husband's vegetable garden.  I love how it looks like it's been cut with a cookie cutter :)

He's got one out there that's getting humongous!  Here's a pic, but it's already way bigger than this.


Wednesday, June 9, 2010

Beef Bourguignon

I finally went and did it, made some beef bourguignon.  
But before I go any further I need to ask, nay...implore you to read to the last part of this post.  I've got a very important thing to share with you.


For some reason, which escapes me now, I decided to go with Ina Garten's recipe.  I think it was a tad easier to follow, although very similar to Julia Child's.  And because I had read repeatedly about how much better it is left over, after I finished it, I put the lid on and saved it for the next day.  Such restraint I have!

This was the fun part....


I don't think I've ever deliberately set a kitchen fire before, then emptied an entire bottle of red wine into whatever I was cooking.  Good times!

Here is the finished product, before it's day long camp out in my fridge.  
Just fyi...I made this in my new Ikea dutch oven my family bought me I bought for myself for Mother's day.  Just in case you're in the market for a dutch oven, I'll just say that I fully recommend it.  It did a fabulous job conducting heat, and was way easier to clean up than I thought it would be.  Also the inside of the lid has little points all over it that I have since learned are basting spikes.


And my review of the stew?  Just amazing.  What else can I say?  I can't think of a single thing I would change about this recipe, (except that I served mine on buttered noodles instead of bread)
 so here it is for you...


Ingredients

  • 1 tablespoon good olive oil
  • 8 ounces dry cured center cut applewood smoked bacon, diced
  • 2 1/2 pounds chuck beef cut into 1-inch cubes
  • Kosher salt
  • Freshly ground black pepper
  • 1 pound carrots, sliced diagonally into 1-inch chunks
  • 2 yellow onions, sliced
  • 2 teaspoons chopped garlic (2 cloves)
  • 1/2 cup Cognac
  • 1 (750 ml.) bottle good dry red wine such as Cote du Rhone or Pinot Noir
  • 1 can (2 cups) beef broth
  • 1 tablespoon tomato paste
  • 1 teaspoon fresh thyme leaves (1/2 teaspoon dried)
  • 4 tablespoons unsalted butter at room temperature, divided
  • 3 tablespoons all-purpose flour
  • 1 pound frozen whole onions
  • 1 pound fresh mushrooms stems discarded, caps thickly sliced

For serving:

  • Country bread or Sour Dough, toasted or grilled and rubbed with garlic clove
  • 1/2 cup chopped fresh parsley, optional

Directions

Preheat the oven to 250 degrees F.
Heat the olive oil in a large Dutch oven. Add the bacon and cook over medium heat for 10 minutes, stirring occasionally, until the bacon is lightly browned. Remove the bacon with a slotted spoon to a large plate.
Dry the beef cubes with paper towels and then sprinkle them with salt and pepper. In batches in single layers, sear the beef in the hot oil for 3 to 5 minutes, turning to brown on all sides. Remove the seared cubes to the plate with the bacon and continue searing until all the beef is browned. Set aside.
Toss the carrots, and onions, 1 tablespoon of salt and 2 teaspoons of pepper in the fat in the pan and cook for 10 to 15 minutes, stirring occasionally, until the onions are lightly browned. Add the garlic and cook for 1 more minute. Add the Cognac, stand back, and ignite with a match to burn off the alcohol. Put the meat and bacon back into the pot with the juices. Add the bottle of wine plus enough beef broth to almost cover the meat. Add the tomato paste and thyme. Bring to a simmer, cover the pot with a tight-fitting lid and place it in the oven for about 1 1/4 hours or until the meat and vegetables are very tender when pierced with a fork.
Combine 2 tablespoons of butter and the flour with a fork and stir into the stew. Add the frozen onions. Saute the mushrooms in 2 tablespoons of butter for 10 minutes until lightly browned and then add to the stew. Bring the stew to a boil on top of the stove, then lower the heat and simmer for 15 minutes. Season to taste.
To serve, toast the bread in the toaster or oven. Rub each slice on 1 side with a cut clove of garlic. For each serving, spoon the stew over a slice of bread and sprinkle with parsley.


Okay, now the really important thing...
If you've never in your life listened to one thing I've said, for the love of all that is holy, please listen now.  
If you've never made the infamous no knead bread, go forth and do so now.  If you have to hire a baby sitter, call in sick, or rent a sled dog team, just get it done!  

Seriously, this is some good stuff.  And just about the easiest thing you'll ever do.


Need more convincing?  


That should do it, so here's the recipe:


Crusty Bread Ingredients

3 cups all-purpose or bread flour, more for dusting
¼ teaspoon instant yeast
1¼ teaspoons salt
Cornmeal or wheat bran (optional)

Directions

1. In a large bowl combine flour, yeast and salt. Add 1 5/8 cups water, and stir until blended; dough will be shaggy and sticky. Cover bowl with plastic wrap. Let dough rest at least 12 hours, preferably about 18, at warm room temperature, about 70 degrees.
2. Dough is ready when its surface is dotted with bubbles. Lightly flour a work surface and place dough on it; sprinkle it with a little more flour and fold it over on itself once or twice. Cover loosely with plastic wrap and let rest about 15 minutes.
3. Using just enough flour to keep dough from sticking to work surface or to your fingers, gently and quickly shape dough into a ball. Generously coat a cotton towel (not terry cloth) with flour, wheat bran or cornmeal; put dough seam side down on towel and dust with more flour, bran or cornmeal. Cover with another cotton towel and let rise for about 2 hours. When it is ready, dough will be more than double in size and will not readily spring back when poked with a finger.
4. At least a half-hour before dough is ready, heat oven to 450 degrees. Put a 6 to 8-quart heavy covered pot (cast iron, enamel, Pyrex or ceramic) in oven as it heats. When dough is ready, carefully remove pot from oven. Slide your hand under towel and turn dough over into pot, seam side up; it may look like a mess, but that is O.K. Shake pan once or twice if dough is unevenly distributed; it will straighten out as it bakes. Cover with lid and bake 30 minutes, then remove lid and bake another 15 to 30 minutes, until loaf is beautifully browned. Cool on a rack. Yield: One 1½-pound loaf.


6/20/10 Update:  I tried making this bread again today and it was a total flop! I have no idea what I did wrong, maybe too much water.  Try, try again!

Monday, June 7, 2010

English Muffin Bread

It was late at night when I took these pics so the lighting was sub par to say the least, but I wanted to share my first endeavor I made with the assistance of my new baby.  


I found this recipe at Cooking During Stolen Moments.  This is just about the easiest bread to make, and is just delicious toasted and smothered in butter and your topping of choice.
Of course, I enjoyed the heck out of using my new mixer and plan to use it as often as possible!


English Muffin Bread
  • 3 c. flour
  • 2 1/2 t. yeast (or 1 packet)
  • 2 t. sugar
  • 1 t. salt
  • 1/8 t. baking powder
  • 1 c. milk
  • 1/4 c. water
  • Corn meal, for dusting the pan
1. In a mixing bowl, combine 2 c. flour, yeast, sugar, salt and baking powder. Mix for 1 minute.
2. While flour is mixing, pour milk and water into a small saucepan. Heat over low heat until warm, about 2 minutes. Pour into mixing bowl and beat for 2 minutes.
3. Add remaining cup of flour, 1/2 a cup at a time, and mix for 3-5 minutes (or knead by hand for 5-7 minutes). Dough will be somewhat sticky.
4. Grease a loaf pan and sprinkle with cornmeal. Spread dough into pan, cover and let rise for 45 minutes.
5. Bake at 400 degrees for 20-25 minutes, until golden brown.

And for your viewing pleasure, here is a lovely hibiscus my hubby is growing by the front door. I think it's such a beautiful color.  I'm so proud of all his growing efforts.  Keeping things alive in this desert heat is not any easy task!