Showing posts with label veggies. Show all posts

Monday, August 22, 2011

Pasta with Caramelized Fennel and Onion

As one of Mark Bittman's newest fans, I now bring you the first thing I made from his book, "The Food Matters Cookbook".  I think fennel is so pretty as well as being crunchy and delicious, and I'm always happy to find a way to use it.  (okay so this only the second time I've ever used it, but who's counting?)
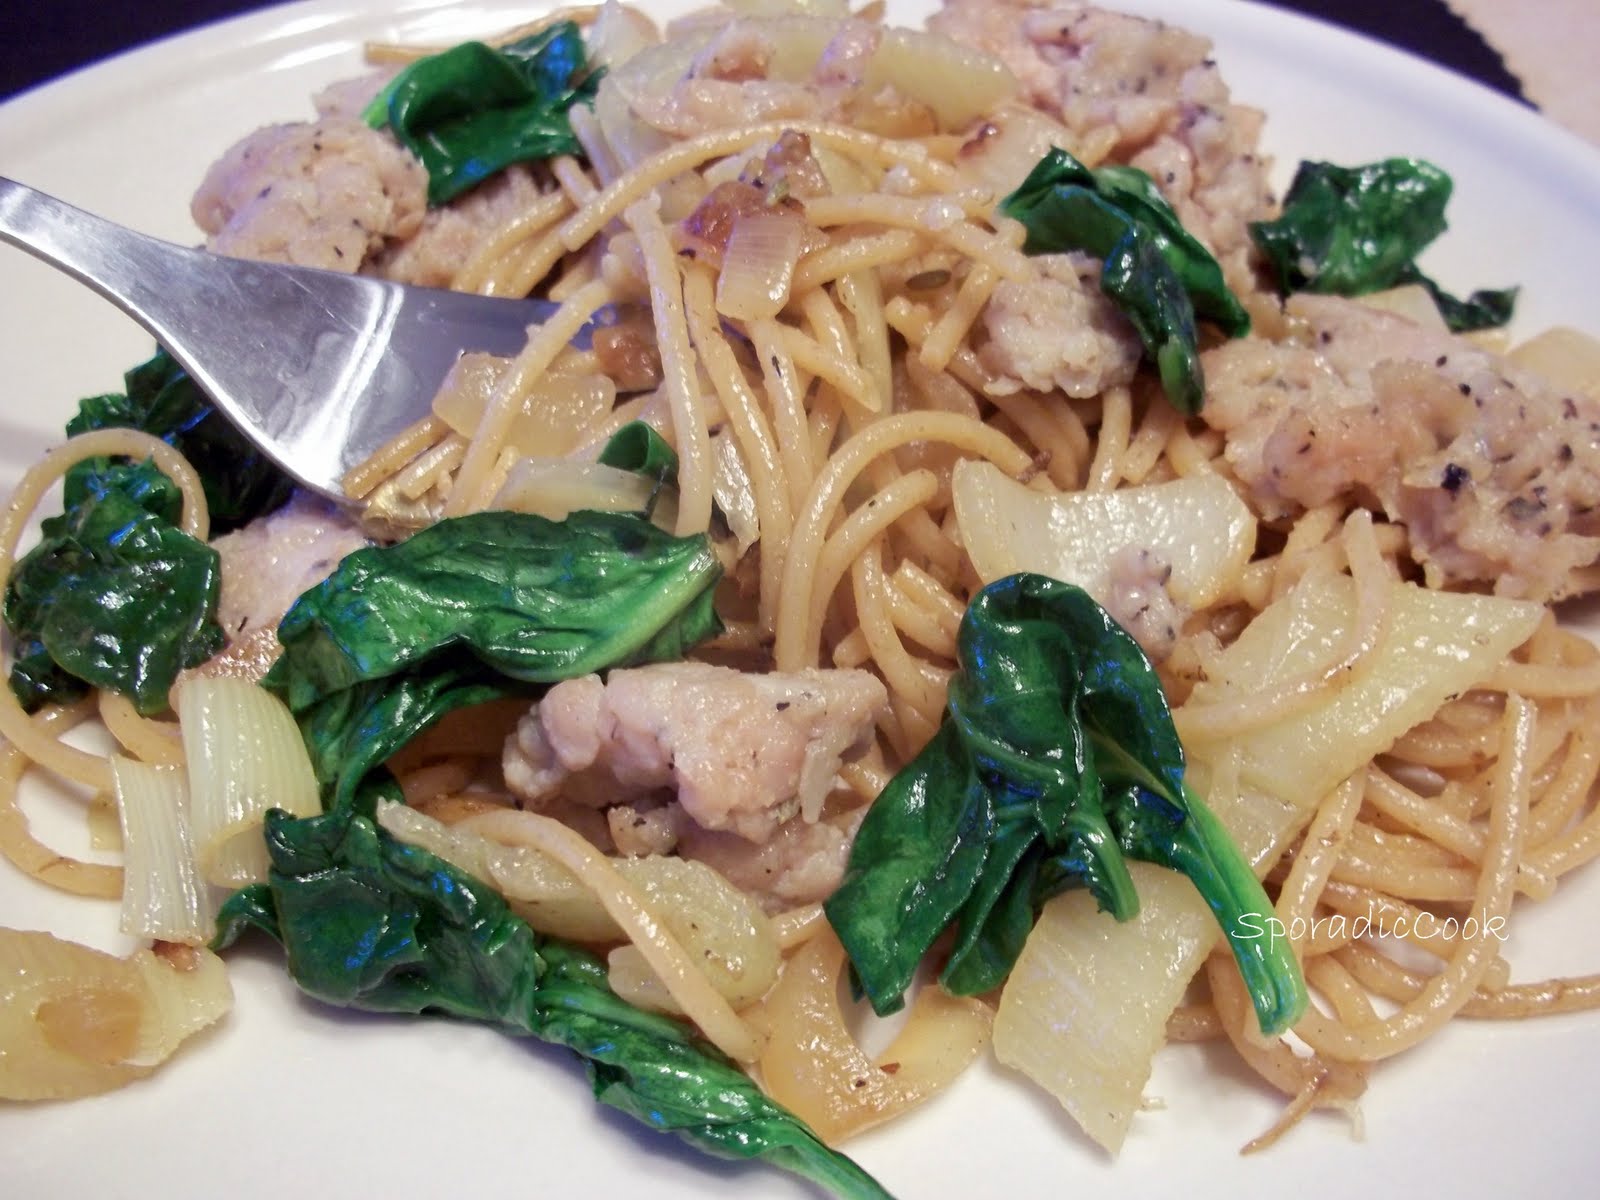
 

I really liked this dish, and all members of the family managed to eat some, so that's saying a lot.  I added some ground chicken sausage, and sauteed spinach for color.  

Here's the recipe for you:

Makes: 4 servings
  • Salt
  • 3 large or 4 medium fennel bulbs, cored and sliced
  • 1 large onion, halved and thinly sliced
  • Black pepper
  • 4 tablespoons olive oil
  • 8 ounces any pasta, preferably whole wheat
  • 1/2 cup white wine, optional
1. Bring a large pot of water to a boil and salt it. Put the fennel, onion, and a sprinkling of salt and pepper in a large, deep skillet over medium-low heat. Cover and cook, stirring every 5 minutes, until the vegetables have given up their liquid and are almost sticking to the pan. Add 3 tablespoons of the oil, raise the heat to medium-high, and cook, uncovered, until the vegetables are nicely browned, 5 to 10 minutes. Turn off the heat.

2. Cook the pasta in boiling water until it's tender but not mushy.  When it's almost done, turn the heat under the skillet to medium, add the wine or some of the pasta cooking water to the pan, and stir to scrape up any browned bits from the bottom.  Drain the pasta, reserving a little of the cooking water.  Toss the pasta in the pan with  the fennel and onion, adding a little of the pasta cooking water if the dish seems dry.  Season as desired and drizzle with the remaining olive oil.  Serve immediately. 


BTW...I'm really enjoying this cookbook.  There are so many things I'm looking forward to making, I don't even know where to start!

Thursday, August 18, 2011

Birthdays and Hummus

Those two things just go hand in hand, don't they?  Where have I been lately, you may be asking?  Just letting the little things all overwhelm me.  Back to school stressed me unnecessarily, I'm trying to diet, and have been a little down in the dumps.  Coincidence, I think not!  But it does bring me to the hummus.


I'm a brand new Mark Bittman convert.  I took some of my hard-earned FoodBuzz money and purchased his book "Food Matters" and the cookbook that goes along with it.  I guess Mark's story is he was getting older and fatter, bad stuff was happening to his health, and his doctor told him he needed to become a vegan.  Which sort of clashed with his line of work, being a food writer and all.  But he decided to try a plan where he is a "vegan until 6" everyday...eating no animal products, just plants, plants, plants.  Then after 6 eat a normal dinner without gluttonizing, and it worked for him.  

So I thought to myself, if he can do it, maybe I can do it.  I like plants.  So I spent this past Sunday prepping veggies, and making beans and oatmeal and brown rice in mass quantities so I would have easy access to things I can eat and so far so good.  I've taken a few pounds off, and feel like it's something I can live with.  Why am I telling you all this?  Beats the snot out of me; here's Bittman's recipe for hummus.

  • 2 cups drained well-cooked or canned chickpeas, liquid reserved

  • 1/2 cup tahini (sesame paste), optional, with some of its oil

  • 1/4 cup extra-virgin olive oil, plus oil for drizzling

  • 2 cloves garlic, peeled, or to taste

  • Salt and freshly ground black pepper to taste

  • 1 tablespoon ground cumin or paprika, or to taste, plus a sprinkling for garnish

  • Juice of 1 lemon, plus more as needed


  • Put it all together in the food processor and blend it together, adding more liquid from the chickpeas if needed.  

    So mine came out a little dry, guess I should have added more liquid.  And it made way more than I needed since I'm the only one who eats it.  Wonder if it freezes well.

    And as for birthdays, my little 5th grade flute-playing chickadee turned 11 today.  She's growing up so fast!  


    This was the first year she requested a homemade birthday cake, and she wanted the same one I made for her dad back in June, without the raspberry sauce.  So obviously that required extra frosting on top!  


    Just as delicious as I remembered.  And there's no chickpeas in it!

    Thursday, June 30, 2011

    Baked Beans with Swiss Chard

     This is a delicious (if not somewhat unphotogenic) recipe found in the most recent issue of The Food Network's magazine.


    This isn't your typical sweet and bacon-y baked bean recipe (although I do love that kind). This lets more of the bean flavor come through, and adds some swiss chard for a little extra nutrition.


    We found it pretty yummy. I was making shredded pork the same night so used that instead of the lean turkey or ham called for in the recipe.


    Here's how to make it....


    • 1 tablespoon extra-virgin olive oil
    • 1/2 small onion, chopped
    • 1 small stalk celery, finely chopped
    • 1 small carrot, finely chopped
    • 2 cloves garlic, finely chopped
    • Kosher salt and freshly ground pepper
    • 1 small bunch Swiss chard or mustard greens, stems removed, leaves chopped
    • 1/2 cup diced smoked turkey or lean ham (about 2 ounces)
    • 1 15-ounce can whole tomatoes, crushed by hand
    • 2 15-ounce cans pinto beans, drained and rinsed
    • 1 15-ounce can navy beans, undrained
    • 1/4 cup chopped fresh parsley
    • 1 teaspoon chopped fresh thyme
    • 1 teaspoon chopped fresh oregano


    Preheat the oven to 375 degrees F. Heat the olive oil in a large skillet over medium heat. Add the onion, celery, carrot, garlic and 1/4 teaspoon each salt and pepper; cook, stirring occasionally, until the vegetables are soft and golden, about 7 minutes.
    Add the chard, turkey and 1/4 cup water to the skillet; cook, stirring, until the chard wilts slightly, about 3 minutes. Add the tomatoes with their juice, increase the heat to medium high and simmer until slightly reduced, about 5 minutes. Add the pinto beans, then add the navy beans and their liquid. Add the parsley, thyme and oregano and return to a simmer.
    Coarsely mash about one-quarter of the beans in the skillet with a potato masher or fork to thicken the mixture; season with salt. Transfer to a 2-quart baking dish. Cover and bake 45 minutes, then uncover and bake 10 more minutes.


    Wednesday, June 22, 2011

    Twice Baked Butternut Squash

    It's time for the butternuts again...looks like we've got a bountiful harvest for our little backyard.  Martha Stewart's recipe for Twice Baked butternuts looked like a good one to try.

    pictures on aluminum foil are just a bad idea

    And good it was,  and pretty darned easy too.  I was most surprised that the girl child even like it!  Give it a whirl if you get a chance...here's the recipe for you.


    • 6 butternut squash (about 9 pounds total)
    • 1 1/2 teaspoons salt, plus more to taste
    • 1/2 teaspoon freshly ground black pepper, plus more to taste
    • 1/2 cup plus 1 tablespoon nonfat sour cream
    • 2 teaspoons paprika
    • 6 fresh chives, cut into 1/8-inch pieces
    • 3 tablespoons fresh breadcrumbs, lightly toasted
    1. Heat oven to 450 degrees with the rack in center. Halve squash lengthwise, and remove seeds and fibers. Sprinkle squash halves with 1/2 teaspoon salt and 1/4 teaspoon pepper. Fill a roasting pan with 1/4 inch water. Place squash in pan. Cover with aluminum foil, and bake until squash is tender when pierced with the tip of a knife, 35 to 45 minutes. Remove from oven, transfer squash to a cool surface, and let cool enough to handle. Reduce oven temperature to 425 degrees.
    2. Use a spoon to scoop baked flesh out of each half into a large bowl, leaving a 1/4-inch border around six of the halves so they will keep their shape. To the bowl, add sour cream, paprika, chives, and remaining teaspoon salt and 1/4 teaspoon pepper. Mix with a handheld electric mixer or potato masher until smooth and well combined. Season with salt and pepper. Fill six squash halves with mixture (discard remaining six empty halves). Sprinkle tops with toasted breadcrumbs. Bake until golden brown and warm throughout, 20 to 30 minutes. Serve.
      Things I did differently:
      I didn't use 6 butternuts, just one, so just decreased the other ingredients by eye-balling it.
      I nuked the butternut before the second baking to speed things up.  I added just a little butter and used store bought bread crumbs. 

      As a side note, I recently tried to make Jamie Oliver's recipe for homemade ketchup.  This sort of fell under the category of "what was I thinking?". 

       It started out promising with some lovely homegrown tomatoes and a mix of other lovely veggies (everything Jamie uses is lovely so I felt I needed to follow suit).  

      When he made this on TV it came together pretty quickly, but in reality there's a lot of "cooking down" time.  Where is my fast forward button when I need it?

      Smelled really great, but in the end, it never thickened up at all, it was more of a "runny tomato sauce".   I ended up using it to flavor some sloppy joes and it was really nice, but way more work that I am interested in investing for such a small result.  Probably yielded just shy of 2 cups.  Oh well, live and learn!

    Saturday, June 11, 2011

    White Beans and Cabbage

    I saw this dish as made by Joanne at Eats Well With Others, and new I had to make it mine.  I adore cabbage and don't use it nearly as much as I should.  


    I sauteed some brats first to go with this dish, then proceeded to prepare the cabbage in the same pan and liked the flavor it added.  I also added a little of the flipflop Chardonnay toward the end and think that was a great touch too :)

    Here's the recipe...hope you'll give it a try if you get a chance.


    2 tbsp olive oil
    4 oz potatoes, unpeeled, scrubbed and cut into tiny cubes
    1 large shallot, thinly sliced
    1 cup dried white beans, soaked and cooked (I used canned)
    8 oz finely shredded green cabbage
    1/4 cup freshly grated parmesan cheese

    1. Pour the olive oil into a large skillet over medium-high heat.  Add the potatoes and a big pinch of salt.  Toss, cover, and cook until potatoes are cooked through, about 5-8 minutes.  Be sure to scrape the pan and toss the potatoes once or twice so that all sides get browned.

    2. Stir in the shallot and the beans.  Let the beans cook in a single layer for a few minutes, until they brown a bit.  Then scrape and toss again.  Cook until the beans are lightly brown and crispy on all sides.

    3. Stir in the cabbage and cook for another minute, until the cabbage loses its structure.  Serve dusted with parmesan.


    We ended up having a bit of a multi-cultural meal this particular night. 


    Along with the cabbage and brats, we had some Mexican Corn Cups I had seen made on the Food Network quite some time ago. (I loved these, I'll put the recipe below for you), and my attempt at fried green tomatoes covered with some homemade salsa.  Not a bad meal!


    Mexican Corn Cups:
    • 4 ears sweet corn, husked and silks removed
    • 4 tablespoons mayonnaise or Mexican sour cream
    • 4 tablespoons unsalted butter, softened
    • 6 tablespoons crumbled queso fresco or mild feta cheese
    • Ground chili powder for sprinkling
    • Salt, for sprinkling
    • Lime wedges, for serving, optional

    Directions

    Bring a large saucepan of salted water to a boil over medium-high heat. Add the corn and cook until tender, about 5 to 7 minutes. Using tongs, transfer the corn to a platter and allow them to cool slightly. Using a serrated knife, remove the kernels from the corn. Divide the corn between 4 individual cups or small glasses. Put 1 tablespoon mayonnaise (I used sour cream) and 1 tablespoon butter in each glass. Sprinkle with cheese, chili powder, and salt. Serve with the lime wedges, if desired.

    Tuesday, April 26, 2011

    Shrimp Cobb Salad & a Product Review

    I'm cooking once again from May's edition of Cooking Light.  This one was found in the category of "SuperFast 20 Minute Cooking".   Just between you and me, it may have taken me slightly longer than that. 


    My little guy loves shrimp, and my big guy does too, as far as that goes.  So including it a salad just makes sense.  I really liked the dressing that goes along with this, but I would make a little more next time...it didn't really go very far.  

    Here's the recipe for you:


    • 4 slices center-cut bacon
    • 1 pound large shrimp, peeled and deveined
    • 1/2 teaspoon paprika
    • 1/4 teaspoon black pepper
    • Cooking spray
    • 1/4 teaspoon salt, divided
    • 2 1/2 tablespoons fresh lemon juice
    • 1 1/2 tablespoons extra-virgin olive oil
    • 1/2 teaspoon whole-grain Dijon mustard
    • 1 (10-ounce) package romaine salad
    • 2 cups cherry tomatoes, quartered
    • 1 cup shredded carrots (about 2 carrots)
    • 1 cup frozen whole-kernel corn, thawed
    • 1 ripe peeled avocado, cut into 8 wedges

    • 1. Cook bacon in a large nonstick skillet over medium heat until crisp. Remove bacon from pan; cut in half crosswise. Wipe pan clean with paper towels. Increase heat to medium-high. Sprinkle shrimp with paprika and pepper. Coat pan with cooking spray. Add shrimp to pan; cook 2 minutes on each side or until done. Sprinkle with 1/8 teaspoon salt; toss to coat.
    • 2. While the shrimp cooks, combine remaining 1/8 teaspoon salt, juice, oil, and mustard in a large bowl, stirring with a whisk. Add lettuce; toss to coat.
    • 3. Arrange about 1 1/2 cups lettuce mixture on each of 4 plates. Top each serving with about 6 shrimp, 1/2 cup tomatoes, 
    • 1/4 cup carrot, 1/4 cup corn, 2 avocado wedges, and 2 bacon pieces.

    I also wanted to mention that I was recently given the chance to try Honest Tea's Zero Calorie Passion Fruit Green Tea.


    I found this to be totally refreshing and delicious.  It's sweet without being overly sweet and a perfect mid-afternoon pick-me-up.  I love that it's got no calories and it's sweetened with stevia.  My husband and I fought over it shared it.  I will definitely be on the lookout for this in the stores. 


    Sunday, November 14, 2010

    Apple Cranberry Galette

    I just spotted this yummy galette today at a lovely blog known as Anecdotes and Apple Cores. I knew I wanted to make it right away.  


    It was thoroughly delicious, and filled the house with the aroma of fall.  
    Here's Monet's recipe.  The only thing I did was substitute dried cranberries for the fresh ones, since I had some already.
     

    1 recipe all butter pastry,
    refrigerated
    2 lb. Granny Smith apples (4 large), peeled and sliced into 1/4 inch pieces
    1/4 cup sugar
    1/4 cup water
    2 tbsp. honey
    1 tbsp. orange juice
    ½ tsp. ground cinnamon
    3/4 cups fresh cranberries
    1 tbsp. unsalted butter, cut into thin slices
    Sugar, for dusting

    1. Preheat oven to 400 degrees and a line a large cookie sheet with parchment paper.

    2. Prepare your filling: In a large saucepan over medium heat, combine sugar, water, honey, orange juice and cinnamon. Heat, stirring often, until sugar has dissolved. Add apples and simmer until softened and opaque, about 5-7 minutes. Remove apples from pan with a slotted spoon, reserving juices in pan.

    3. Add cranberries to pan and simmer until they begin to pop and the liquid thickens, about 2-3 minutes.

    4. Combine apples and cranberries in a medium bowl, stir until berries are evenly distributed.

    5. On a lightly floured, roll out your refrigerated pie dough to a 12 inch circle. Transfer your circle to your prepared baking sheet and spoon filling in the center, leaving a 1-2 inch border. Fold the border over the filling, pleating the edges to form a broad rim. Lay the thin slices of butter over the fruit and dust the crust with raw sugar.

    6. Bake in preheated oven until pastry is a light golden brown and the fruit has softened, about 30-40 minutes. Allow to cool to room temperature before serving.

     Today I also made some Stuffed Acorn Squash.


    These were easy and quick since they are prepared in the microwave.  And I really enjoyed the combination of the sweet and savory stuffing with the squash.  Click here for the recipe.  

    Last but not least I also tried a recipe I saw for some corn pudding.


    I found it edible at best, but the kids seemed to like it.  Maybe it's because of the sweetness.  Here's the recipe if you're interested. 

    Monday, August 2, 2010

    Raspberry Cream Pie

    At the risk of suffering ridicule from a certain friend of mine, I present to you the perfect summer dessert from The Pioneer Woman.  (my friend has pw issues, but she's a little under the weather with the plague or something, so maybe she won't even notice)


    This pie is simple, creamy, not too sweet, and just awesome.  Make one today.  And if you want to be a lazy slacker like me, just buy the crust instead of making it out of oreos.  It is still summer for pete's sake, don't do anything that's going to just lead to extra dishes later. 

    Here's the recipe

    Ingredients:

    ■25 whole Oreo Chocolate Sandwich Cookies


    ■4 Tablespoons Butter, Melted

    ■1 cup (generous) Raspberries

    ■3 Tablespoons Sugar

    ■2 containers (6 Ounce Each) Raspberry Yogurt

    ■1 package (3.4 Ounce) Instant Vanilla Pudding Mix

    ■1 cup Heavy Whipping Cream

    ■Extra Raspberries For Garnish

    Directions:
    To make the crust, preheat oven to 350 degrees. Crust cookies in a food processor (or smash in a Ziploc bag with a rolling pin). Stir in melted butter until all combined. Pour into a regular pie pan and press crumbs all over the pan and up the sides. Bake for 3 to 4 minutes—just long enough for it to set. Cool crust completely.


    Place raspberries on a plate or in an empty pan. Smash them with a fork, then sprinkle on 3 tablespoons of sugar. Stir together and allow to sit for 15 minutes.

    In the bowl of an electric mixer, combine raspberry yogurt with the instant vanilla pudding mix (just the powder itself.) Beat on low until combined, about 1 minute. Pour in heavy cream and whip on low for 30 seconds. Stop the mixer and scrape down the bowl with a rubber spatula. Turn mixer on medium-high speed and beat for two minutes, or until mixture is thick.

    Turn off mixer, then fold in raspberries until just combined. Pour into cooled pie pan and spread evenly. Freeze for two hours, or until very firm. Cut into slices and top each slice with cookie crumbs, dollops of whipped cream, and extra raspberries. Keep in freezer, allowing time to thaw before serving.


    Also check this out.  Actual vegetables grown by my actual husband.  We've got butternuts out the wazoo, so if you've got recipes, by all means send them my way.


    This was a pretty straightforward preparation of the squash.  I just peeled it and cut it into chunks.  I gave it a head start on cooking by placing it in a dish in the microwave with a bit of water at the bottom, covered it loosely and nuked it about 4 minutes.
    Then I drained off the water and tossed the squash with salt, pepper, about 2 tbsp of olive oil, 2 minced garlic cloves, and just a touch of nutmeg. 
    Then it was baked  uncovered until the squashies were tender...about 25 minutes.  At this point I tested it and thought it was a tad on the dry side, so I dotted the top of the dish with pats of butter, and a generous sprinkling of parmesan cheese, and put it back in about 4-5 more minutes.  Just delicious!!

    Saturday, May 22, 2010

    Basil Oil

    It's a fun filled Saturday night in the Sporadic Cook household.  One of my facebook friends suggested we all "get our freak on".  I'm not really sure what he meant by that, so I decided to make some basil oil I had noticed in the latest Food Network magazine.

    speaking of facebook, I have a page there...check it out! 


    I have a little basil plant that seems to be floundering so this seemed like a great chance to pluck all the leaves off and use them up, since this uses a large quantity of basil at one time...two cups.
    The recipe says you can strain it if you want to, but I like the chunky look.


    I wished I had a cool little glass bottle or jar to put it in, but the rubbermaid container will have to do.  


    Of course after making it, I had to give it a try. All I could find was some bread, so I just drizzled some on strips of toast.  I really think it's yummy, and if you've got some basil that needs to be used up, this is a great way to go.  
    I think later in the week I'm going to try it with some grilled steak possibly.  


    Here's the recipe for ya.

    Basil Oil (by Emeril Lagasse)

    2 ounces fresh basil leaves (about 2 cups packed)
    3/4 cup canola, grapeseed, or other vegetable oil
    salt

    1.  In a small bowl, combine 1 cup ice cubes with 1 cup water.  Set aside.

    2.  Bring 2 cups water to a boil.  Add the basil leaves all at once, and stir to makes sure they are submerged.  Cook for 10 seconds.  Immediately transfer them,  using slotted spoon, to the ice bath.  Once cooled, remove the leaves and set them on paper towels.  Squeeze the paper towels gently but firmly in your hands to absorb as much liquid as possible.

    3.  Pour the oil into a blender, add 1/8 tsp salt and mix on high speed.  While the machine is running, add half the basil leaves and process briefly.  Then add the remaining basil and puree.  Transfer the basil oil to small container, cover and refrigerate up to one week.  (If you like, strain the oil through a fine mesh sieve).


    So, what are you up to this weekend?

    Monday, January 18, 2010

    Braised Beef Brisket and Cucumber Salad

    As promised, here is Tyler Florence's braised beef brisket. Which may or may not be his, incidentally. When I went to the Food Network site to find it, the recipe had been removed. So this one comes from RecipeZaar (click there for recipe) and claims to be his. If it's not, I apologize.
    This brisket has a pretty easy prep, and the aroma in the house during it's cooking was a bit maddening.
    The recipe instructs you to strain off the veggies and toss them, but I just couldn't bring myself to do that. Then I wouldn't have had this bowl full of yummy stuff with that fun little half garlic head.
    So in the end, how did it compare to PW's brisket? I hate to say it, but hers wins, hands down. This one makes a nice meal, no doubt. But I won't be waking up at 2 a.m. thinking about it, unable to go back to sleep. Maybe hers is better because of the long marinading time, or cooking it low and slow. I dunno, all I know is I big time puffy heart love it!
    I've been seeing lots of Ellie Krieger recipes floating around. This cucumber salad is one of them. It was pretty good, maybe a little salty.
    I'm not sure if I'm crazy about Ellie overall. I guess she's okay if you like little pixie haircuts on cute pixie faces, perfect skin, and calm demeanors. If you're into all that. Whatever.

    Wednesday, January 6, 2010

    Dim Sum Style Pork Buns

    I'll preface this whole thing by saying that I don't claim to know jack about making any sort of Asian food with any degree of authenticity. But a couple of years ago I had the opportunity to try dim sum and the bbq pork buns they served have haunted me ever since. (yes, I did try the chicken feet, too)
    So these are my attempt to recreate them at home. They weren't really much like the ones I had at the restaurant, but I enjoyed them just them same.
    This effort is a combination of a couple of different recipes but mostly based on the one found here on TLC Cooking.
    You start by making a 12 oz pork tenderloin and chopping it up really small. Mine was more like a pound and half so I didn't chop it all up.
    I pretty much followed the directions found on the TLC site for the filling but I didn't use the mushrooms.
    The bread dough is from the frozen aisle and instead of a whole loaf I got the rolls. I defrosted about 9, but I think 12 would have been better to use up all the filling. After they have defrosted and risen, you just punch them down individually and make a little circle about 3 or 4 inches in diameter. Then pinch it up to close it.
    After this place them seam side down to rise again about 45 minutes.
    I think he's kinda purty. Even the picky boy child ate a little of it.
    So do I recommend trying this at home? Sure if you're feeling adventurous and got a little time on your hands. Go for it!
    I also made some fried rice cakes which start out with a box of chicken flavored rice and vermicelli. I should have known right there to not even start. They didn't really stick together like they should, and the flavor is just okay. I burned just about every finger I have making these things too. Oh well, live and learn.
    We also had some roasted cauliflower that I found a recipe for at Home with Mandy.
    I am not a cauliflower fan at all, but this made it quite a bit more tolerable. Could have been that 3/4 stick of butter, but whatever.